This week we’re going to learn some pastel drawing and painting techniques. If you’ve taken the Module 2 Colored Pencil Techniques class, you’ll be familiar with most of these, but using pastels is a whole different world. After going over the basics, I’ll show you how to use what you just learned to create a regal peacock feather.
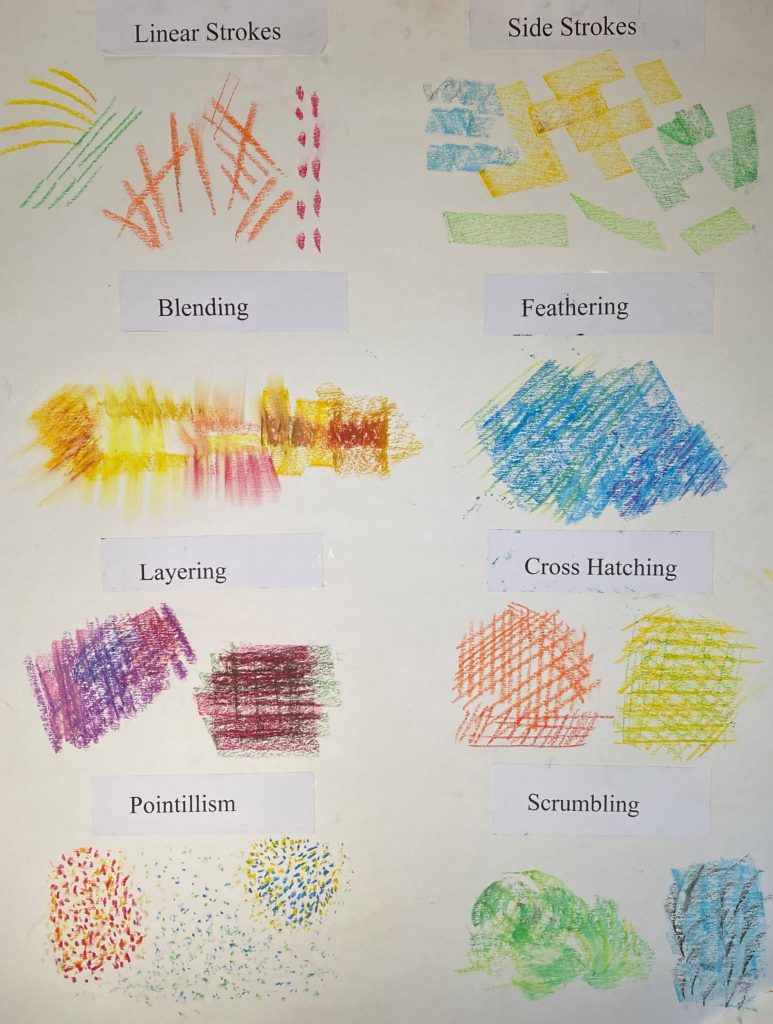
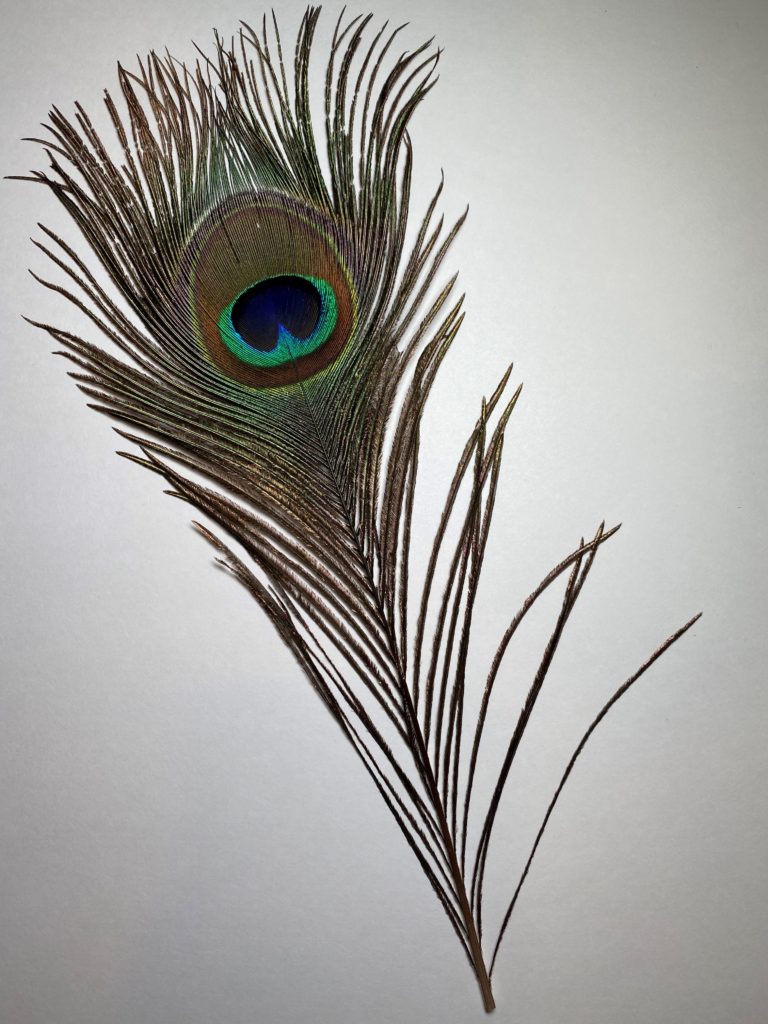
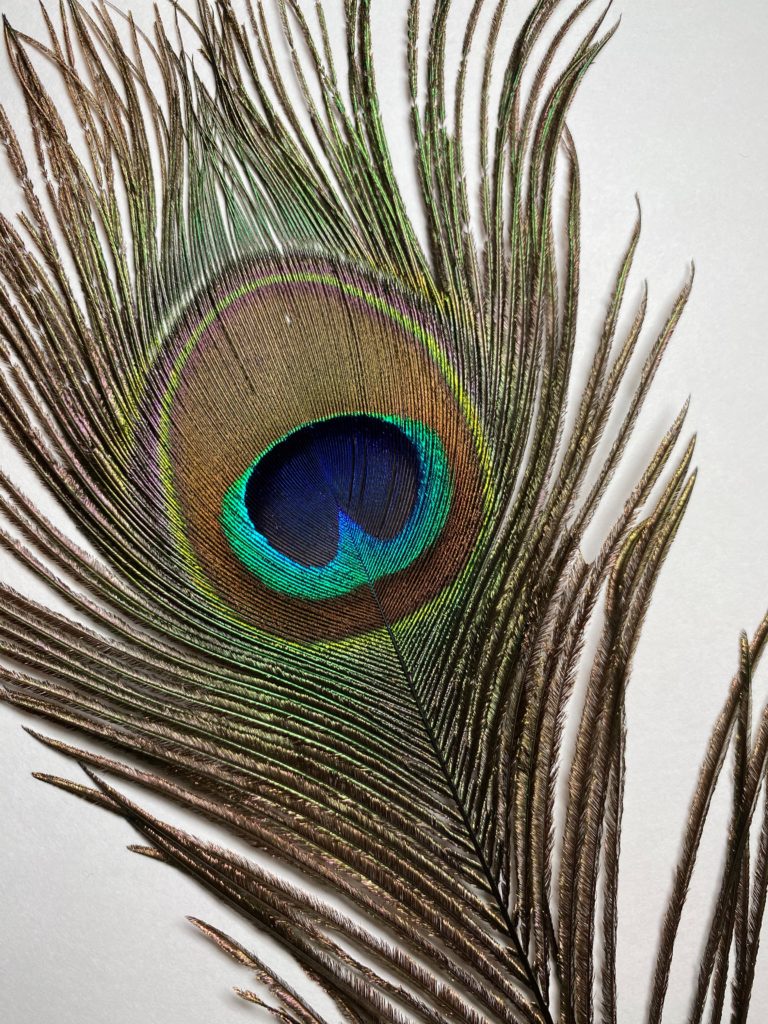
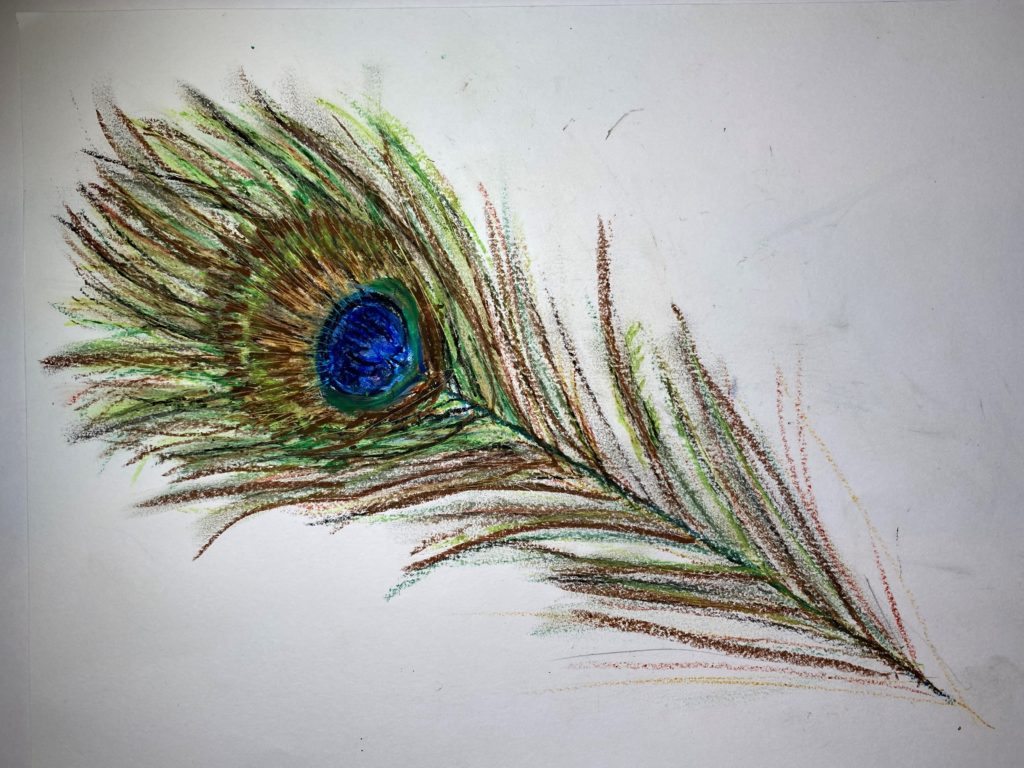
There are two pictures of the peacock feather I used as my model, one full length and one close up on the top. You can find these below and at the Supplemental Materials page. Also available are a picture of my techniques example board and my completed artwork, as promised in the video.
You’ll see on my completed feather picture that I left many smudges around the page, and you might too. Don’t worry about it while you’re learning and practicing, we all make a mess sometimes. Maybe you can turn those smudges into a cool background or add another item and make a still life! The possibilities are endless.
Please make sure you have these supplies:
- Oil pastels
- A pencil
- A small stack of white paper
- Cotton swabs
- Lotion
- A damp towel
- The picture of the peacock feather from the downloads bar or another object to model
Your optional materials are:
- An eraser
- Blending stumps (tortillons)
- A file folder or paperclip for organization
Practice, practice, practice!