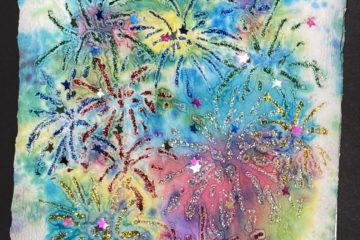
I know I’m about a month late with this “Shark Week” inspired project, but since I saw the theme happening throughout my Instagram feed, especially within the homeschool community, I wanted to “swim” with it. After researching these amazing and feared creatures, I was curious as to how I could replicate their sleek beauty.
I decided to follow the advice I give my students and start with a sketch. After spending time sketching and fine tuning my sketching, I’d see which artistic path to follow and choose a final technique and medium. What showed up for me as the most exciting option was printmaking. Printmaking has always been one of my favorite artistic methods, I have multiple YouTube classes focused on different printmaking styles and Module 4 is completely dedicated to it, so naturally I envisioned the possibilities with my shark subject.
In my experience, printmaking has planned and unexpected results, almost always presenting something interesting. As I was trying to create some planned results, I found difficulty trying to figure out how to capture the unique shimmering quality of shark skin. That shimmer is a result of light filtering and reflecting through water, and I wasn’t sure how best to show that in a print. Most of the interior of my shark image needed be removed, or rather pressed down into the foam plate, to enable the color of the paper to be prevalent.
My first step was the process of taking the finalized shark sketch and copying it onto the foam plate. The sketch can be done directly on to the plate or transferred without graphite, by taping your sketch and carefully creating shallow indentations like I did in the video. I also like having the option of graphite copying for projects like these. Having the graphite drawing directly on the plate, especially one I was happy with and wanted to identically copy, can give more control when impressing the foam, but different methods work best for different artists.
This process leads to the most time-consuming segment of printmaking, indenting the image into the printing plate. Once the image has been indented into the foam you must go over your indentations again and again to insure depth of lines. Anything indented remains the color of the paper (negative space), and all areas which are still raised will be the color of the ink. This meant that I had create large indentations for most of the shark itself, with plenty of negative space for my colored paper to show, and make sure there was an outline of the shark visible with the raised portions of the plate I left behind.
Finding the right tools when hand making a printing plate is always an experiment to see which and what works best. I have a variety of dedicated artistic tools and supplies, but I often find myself in my toolbox or kitchen drawers when searching for something to create with. Immediately I went to a flat tipped screwdriver for the larger areas and my embossing tool for small areas. These seemed to work in perfect coordination with my faithful pencil.
Now for the complication I wrote about previously; what to do about the paper color? My first choice was gray, as it is the most faithful choice to truly mimic the color of shark skin. My print was good, yet it didn’t have the dramatic effect a shark in water possesses. I wasn’t capturing the light or getting the shimmer I was after.

As you know, I have an almost ridiculous amount of paper in different textures, weights, sizes, and colors. It was time to really rummage through my supply to find something amazing. And I hit the jackpot for this project! I found a few pieces of silver construction paper left over from a class I taught years ago.
As giddy as I was about finding perfect color, I worried that the ink would not adhere to or dry properly on the metallic paper. So, I did another trial print and it worked out perfectly.

What I used in this project:
- A pencil
- A small stack of white sketching paper
- Silver metallic construction paper
- Black printing ink (could also use acrylic or tempera paint)
- Foam printing plate (could also use a disposable foam dinner plate)
- Tools to create the shark image (screwdrivers, embossing tools, use your imagination)
- An ink roller
- A plate or paint palette for the ink
- A damp washcloth
- Optional: graphite transfer sheets for copying your image
The steps for getting a shark print
- Sketch a shark, or a few sharks, using the pencil on the white paper.
- Transfer the shark sketch to your foam printing plate either by drawing it free hand, taping your sketch and carefully doing a light imprint, or using a graphite transfer sheet to copy the image.
- Use your imprinting tools to create your shark image on printing plate. Remember that anything pushed down with your tools will show the negative space of the colored paper, and anything left raised will show the ink.
- Roll the ink over the shark image on the plate, covering it completely, then press the inked side down on your paper.
- Remove the printing plate carefully and enjoy the result!
Here is my finished print from the video:
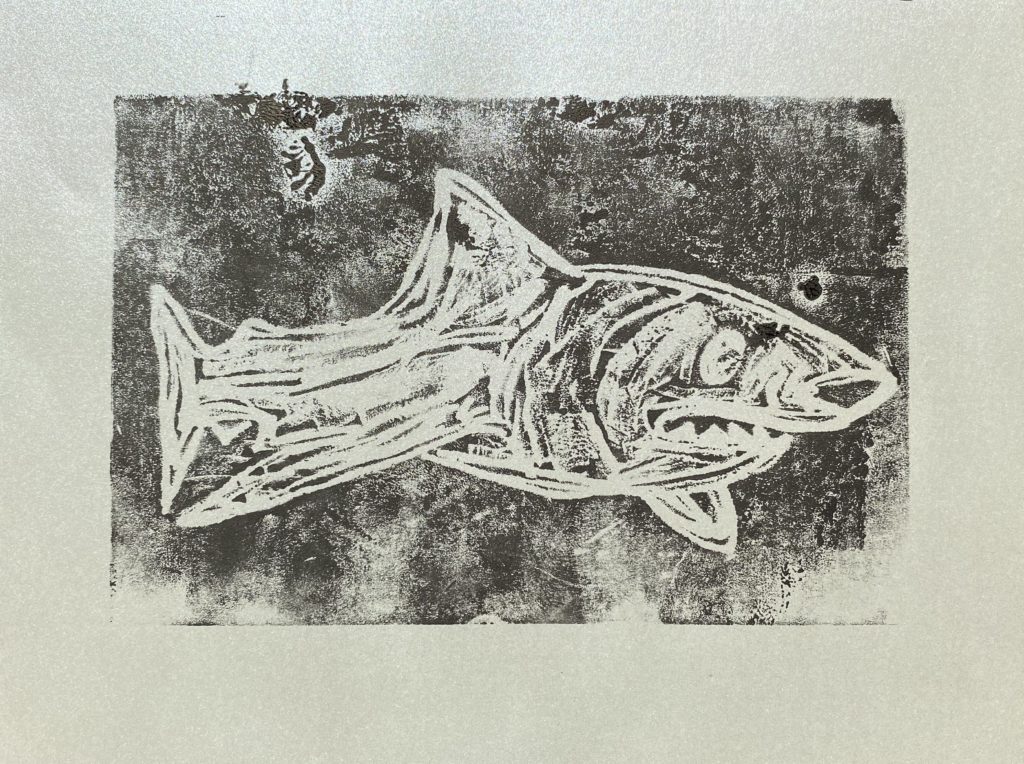
It definitely looks a little rougher than my other prints, but I think the story about this shark is she’s older and has seen a few things in her day. It’s important to see the beauty in all your artwork, even the things you believe could use some improvement.
I couldn’t wait to share this with all the shark and oceanic lovers out there! This lesson is proof that you can accomplish almost anything with an idea, the willingness to investigate it, and the determination to keep at it until you are satisfied. And remember, so much fulfillment comes from teaching what you learn to someone else, so get out there and share your creativity and artistic knowledge!